Hi everyone!! I know it's been a while since I have made any posts. Things are changing in a big way for our family very soon and we have been focusing on making things happen. I just wanted to give you an update and say Thank You for reading the blog and hopefully getting some good ideas to play with your kiddos!
I also wanted to let you know that, when I do get back to the blog on a regular basis, I am gonna have to restructure it a bit. It seems I have hit the limit on photos allowed. I will be going through old posts and slimming them down a bit, so that I have room to work with in future posts. But don't worry. There is no limit on the number of photos I can post on my FB page! I will always add any additional pics of activities and play over there! Thanks again for sticking it out and please be patient during this transition. :)
Wednesday, May 30, 2012
Friday, April 6, 2012
Glow Egg Hunt
It's the Friday before Easter, so time to kick off the Holiday events! We decorated Easter eggs in the morning and after bath time this evening Daddy and I put together this glow in the dark Easter egg hunt for Caitlyn! We used plastic Easter eggs and some glow stick bracelets. I highly recommend using the smallest glow sticks you can find, some finger lasers, or small lights, because it was rather difficult fitting these in the eggs. I also added a small candy in each egg :)


She was so proud she found them all!
Happy Easter everyone!
Tuesday, April 3, 2012
Popsicle Stick Puzzles
I wanted to make my oldest daughter some Popsicle stick puzzles that she would enjoy playing with, so I found some images online of some of her favorite things and printed them out. Here is what you need to turn your little ones favorite images into puzzles, too!

What You Need:
Print-outs of pictures
Popsicle sticks (larger ones work best)
A Laminator (although not necessary, still a good idea)
Lamination sheets
Glue
Blade Cutter and/or Scissors
I started off buy cutting out the images I printed up (using 4x6 pic size on my printer) and then cutting them into strips about the same width as the Popsicle sticks.

I laid them in the lamination sheets, making sure the pieces were not touching each other.

I try to fit as many as I can on each sheet, I hate wasting space. I'm weird like that :P
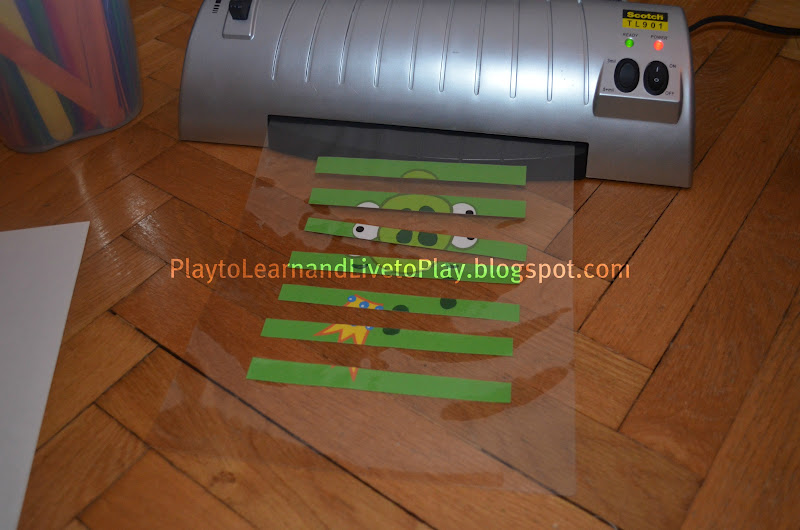
Then I ran the sheets through the laminator.
You can skip laminating the images if you don't have a laminator and that is fine. I just wanted them to be more durable.

After they were laminated, I cut each piece out using my blade cutter. You can use scissors too, but I get a much cleaner cut with this nifty little device!

Use a little (the picture above has way too much!) glue to adhere the strips to the sticks.

Let 'em dry and there you have it!

I was very happy with the way these turned out! But there is still another way you can use them!

If you get some magnetic adhesive sheets, you can add some strips of that to the back of the Popsicle sticks and make them Magnetic Puzzles!

Mario is now on my fridge! :D

Enjoy! And happy Playing!
Saturday, March 24, 2012
Puffy Paint
This is the Puffy Paint invitation I set up for Caitlyn. If you don't know what Puffy Paint is, I first saw it here. It is a paint made with flour and other food ingredients. (I have a post with the recipe and instructions here.) And when you are done painting with it, you pop your painting into the microwave for about 30 seconds, or until dry. The paint stays fluffy! It's a really fun rainy day activity.

I set out some pieces of poster board (you can also use cardboard, but make sure you use something stiff. You'll need to carry it to the microwave before it is dry), some brushes, some foam stamps, and a few cotton balls.
Recipe: Puffy Paint
This is Puffy Paint. You paint with it, then nuke your painting in the microwave for about 30 seconds (or until dry), and it puffs up! Pretty cool!
I wrote a whole other post about the paintings my daughter did here. So this is just the recipe for you.
Here is what you will need:

1 Tablespoon of Self-rising Flour
1 Tablespoon of salt
Food Coloring
Water
OR
1/2 cup of Flour + 2 Teaspoons of Baking Soda
2 Teaspoons of salt
Food Coloring
Water
Bowls to separate each color in.
I didn't have self-rising flour, so I used the flour and baking soda combo. I have a feeling that the self-rising flour is a better option though. It may fluff up more, we will have to try it out next time!

Mix out the dry ingredients.
Then separate the mixture evenly into as many bowls as different colors you want to make.
Add a few drops of food coloring to each bowl.
Then slowly add a little water to each until they are a smooth paste.

Glob it onto the poster board or cardboard for best results. The thicker the paint, the bigger the fluff! Just try to avoid HUGE globs, or it may not dry evenly.
Enjoy!
Thursday, March 8, 2012
St. Patrick's Day: Find the Gold!
To celebrate the upcoming St. Patty's Day I put together this sensory activity for Caitlyn. The goal was to find all of the "gold" under the rainbow! She got to keep whatever she found and put it in her piggy bank. It was quite fun for her. Even Izzy got to join in.
First I spread some coins out in the bottom of one of our sensory containers.
 |
| I used some Euro coins, because they looked more like gold to me, but you can use pennies or gold coin chocolates too! |
Friday, March 2, 2012
Translucent Silly Putty: Play
Translucent Silly Putty!! I have been wanting to do this one for a while, but could not find the right glue! As I mentioned in the How To for this putty, I saw it first on Play at Home Mom. Since then I have seen variations here and there on the Internet, but I went ahead with the simple recipe they had. I think it turned out really great! ( I may just play with it more than my kids...)
 |
| And of course, it is translucent, so PERFECT for the light box! |
Translucent Silly Putty: Recipe
Here is a recipe for some really fun clear silly putty! I saw this at Play at Home Mom a while back and have been wanting to try it ever since! I JUST found a store with clear glue and I am so excited we finally got to do this!
Here is what you need:
STA-FLO liquid starch
Clear school glue
Mixing bowl
Food coloring (optional)

Wednesday, February 29, 2012
Imaginative Play
Doing crafts and projects with your kids is awesome, but you can't always be doing structured activity. And you shouldn't anyways. Children need to explore their worlds without the limitations that doing a specific project can have.
I like to set up invitations for my kids that supply the things needed for an implied task, and see where they take it. They can explore freely within the invitation without feeling limited. It is one way to gain interest in a specific topic without taking charge and interfering with the learning process. A good example of this would be setting up an invitation with water and different sized containers. They will probably start playing by filling each container and then transferring the liquid from one container to another. You get them set up and then they take the lead. You answer any questions (or just be around for younger ones) and they get to learn all about how the same amount of liquid doesn't fit or fill different sized containers. Plus, it's just plain fun!
But even setting up invitations can't happen every day and they aren't truly limitless, so it is important to have "open-ended" toys in your play area. These are toys that can be used in more than one way. Construction toys are a great example. Blocks, Legos, Marble runs. Things that can be broken down and build back up over and over in new ways.
 |
| Here my daughter is breaking down a "bridge" she built to build another structure. |
 |
| Her Q-Ba-Maze Marble run that can be built in any way desired. |
Craft supplies are also open-ended and can be used in whatever way their imagination takes them.
 |
| Some supplies she got out and decided to use. |

Of course, you have to not mind messes too much :)
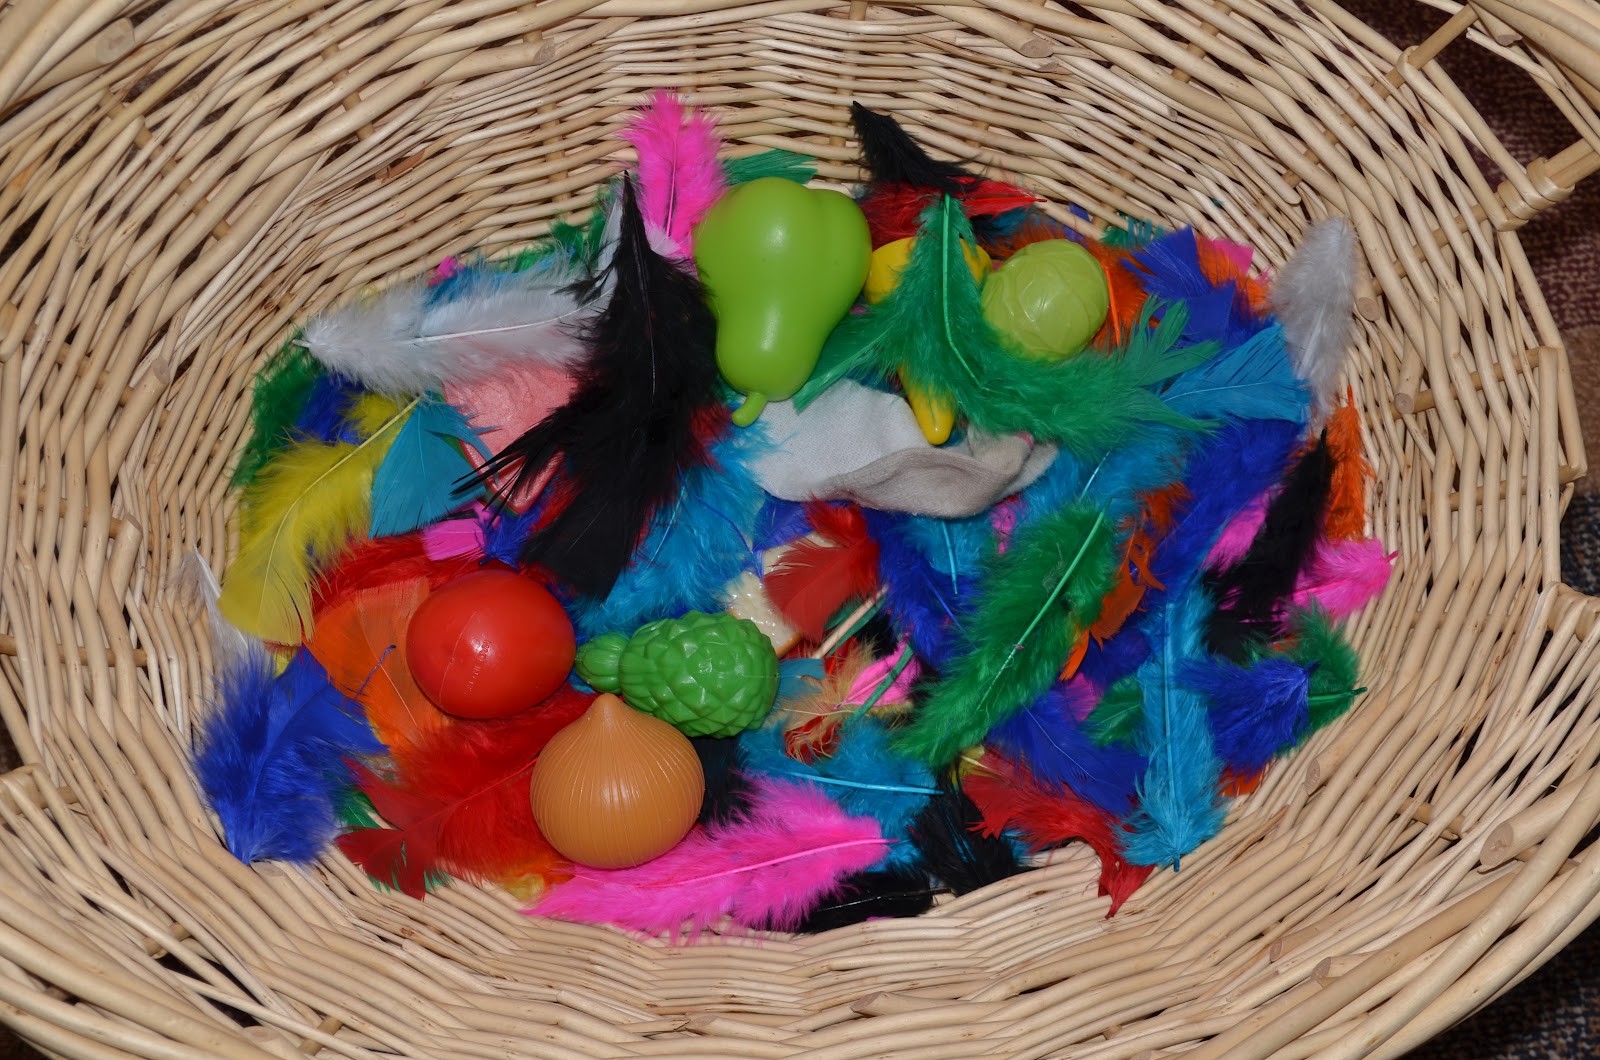 |
| A nest my 4 yr old made with crafting feathers and her play foods for eggs. |
These types of toys and supplies foster the imagination and don't require constant instruction. And they take a lot of the pressure off of you as far as having to plan activities all the time. It really isn't necessary,or even ideal, for EVERYTHING to be planned out.
So next time you are looking for a toy for your little one, ask yourself, can this be used in many different ways, or does it have only one function. And keep in mind that, like in the photo above, even play food can become something else, in the minds of our children.
Friday, February 24, 2012
DIY Wooly Willy
My daughter is starting to really get into magnets and it reminded me of this game my sisters and I played with as kids. I'm sure you have all seen a Wooly Willy before, and if not, you need to look it up! They are really simple, yet so amusing. It is basically this bald guy that you can give hair to using iron filings and a magnet. Anyway, I wanted my daughter to have one. I could have ordered her one online, but I wanted to put a twist on the traditional version and make it bigger as well. Here is what I did.

Wednesday, February 22, 2012
DIY Bubble Toys
We finally got a warm spring-like day here and Caity, my 4 year old, wanted to play outside.
It was still pretty muddy so I set up this bubble invitation for her and her friend on our balcony. And since I didn't have any bubble wands or toys to play with, I threw together some items I had laying around and created a couple homemade bubble toys.
 |
| Here is the bubble invitation with the sensory bin full of soapy water. I provided some colored water for them to play around with, a turkey baster, a couple of single straws, and two DIY bubble toys made of plastic cups and straws. NOT PICTURED is the bubble wand I made out of a jumbo Popsicle stick and a pipe cleaner. That can be found below in the next set of pics. |
Monday, February 20, 2012
Bean Sensory Bin
I love, love, LOVE sensory bins! You can do sooo many things with them!
You can do simple ones like this, or themed ones. For example, you could do a "Day at the Beach" one with sand, sand toys, water, shells etc.etc. Or you could do a "Camp Out" with dirt, twigs, rocks, and make little tents......like I said, soooo many possibilities! And all you really need to start is some sort of "bin". We use large Rubbermaid containers.
Here is one of our bins set up with different kinds of dry beans and some popcorn kernels. The idea is simple, but I was amazed at how long my kids played with this. In fact, right now it's 2 days later and they still keep going back to it.

Sunday, February 19, 2012
Make Liquid Watercolor Paint
I really wanted to get some liquid watercolor paints for my daughters, but the ones I wanted wouldn't ship to where we live. So I found a recipe online here. It is really simple (something I love!) and takes very little time.
Here is what you need:
2 cups of water
2 tablespoons of Vinegar
Food coloring
Containers to store liquid water color paints in (I used baby food jars (stage2))

Saturday, February 18, 2012
Roller Painting
This is the invitation I set up today for my 4 year old and her friend! I have seen this done with just marbles before, but I thought I would make it interesting and provide several types of balls and also some jacks in addition. I call it Roller Painting!
To do this at home, you will need:
Paints, any colors
A large container
Poster board (cut to fit inside container)
Assortment of objects to roll the paint around

The Invitation.
Tuesday, February 14, 2012
Valentine's Day Sensory Bin
Happy Valentine's Day to everyone!! This is one of the ways we are celebrating today!
Here is our heart shape themed sensory bin/ Valentine's craft.

Inside we have heart shaped cut-outs of cardboard, pink and red paint, a bowl of Epsom salt, a bowl of cotton balls, red glitter, glue, and red colored rice!
Monday, February 13, 2012
Make Colored Rice
I wanted to make some colored rice for various craft projects and for use in the sensory bin, so I thought I would share how to do this with you. It is simple and even fun if you let the kiddos help out.
Here is what you need:
White rice
Food Coloring
Rubbing Alcohol
Containers for mixing
Containers for storing when complete
Wax paper or something similar

Sunday, February 12, 2012
Epsom Salt, Colored Water, and Volcanoes
This one started off pretty simple with just some Epsom salt in the sensory bin and these $1 spray bottles filled with water and food coloring. She loved coloring the salts and touching them. I have to admit it did feel really cool! But then she started talking about how the red salt looked like lava, (she has an obsession with volcanoes lately) and Daddy heard her. And like all daddies he heard mention of something explosive and decided to join in!

Saturday, February 11, 2012
Caitlyns Craft Area
I know this isn't a typical post, but I wanted to talk about the craft area we have set up for our kids. This is important because it shows that we try to make all of the supplies available to them. We trust our eldest to be responsible with her things. This takes some patience and sometimes some gentle correction. But over time I have gotten more comfortable with allowing Caitlyn to have full-time access to these items. I should have started this sooner, and I always have had certain things within her reach, but it has only been the past few months or so that I have really started to give her more to explore with on her own. It builds self-esteem and confidence when children are allowed to be in control and know they are trusted. It is also an important part of Child-led play to have everything they need available to them. How can they lead in an activity if they do not have access to the materials? So this is what our (ever-evolving) craft area looks like!
Wednesday, February 8, 2012
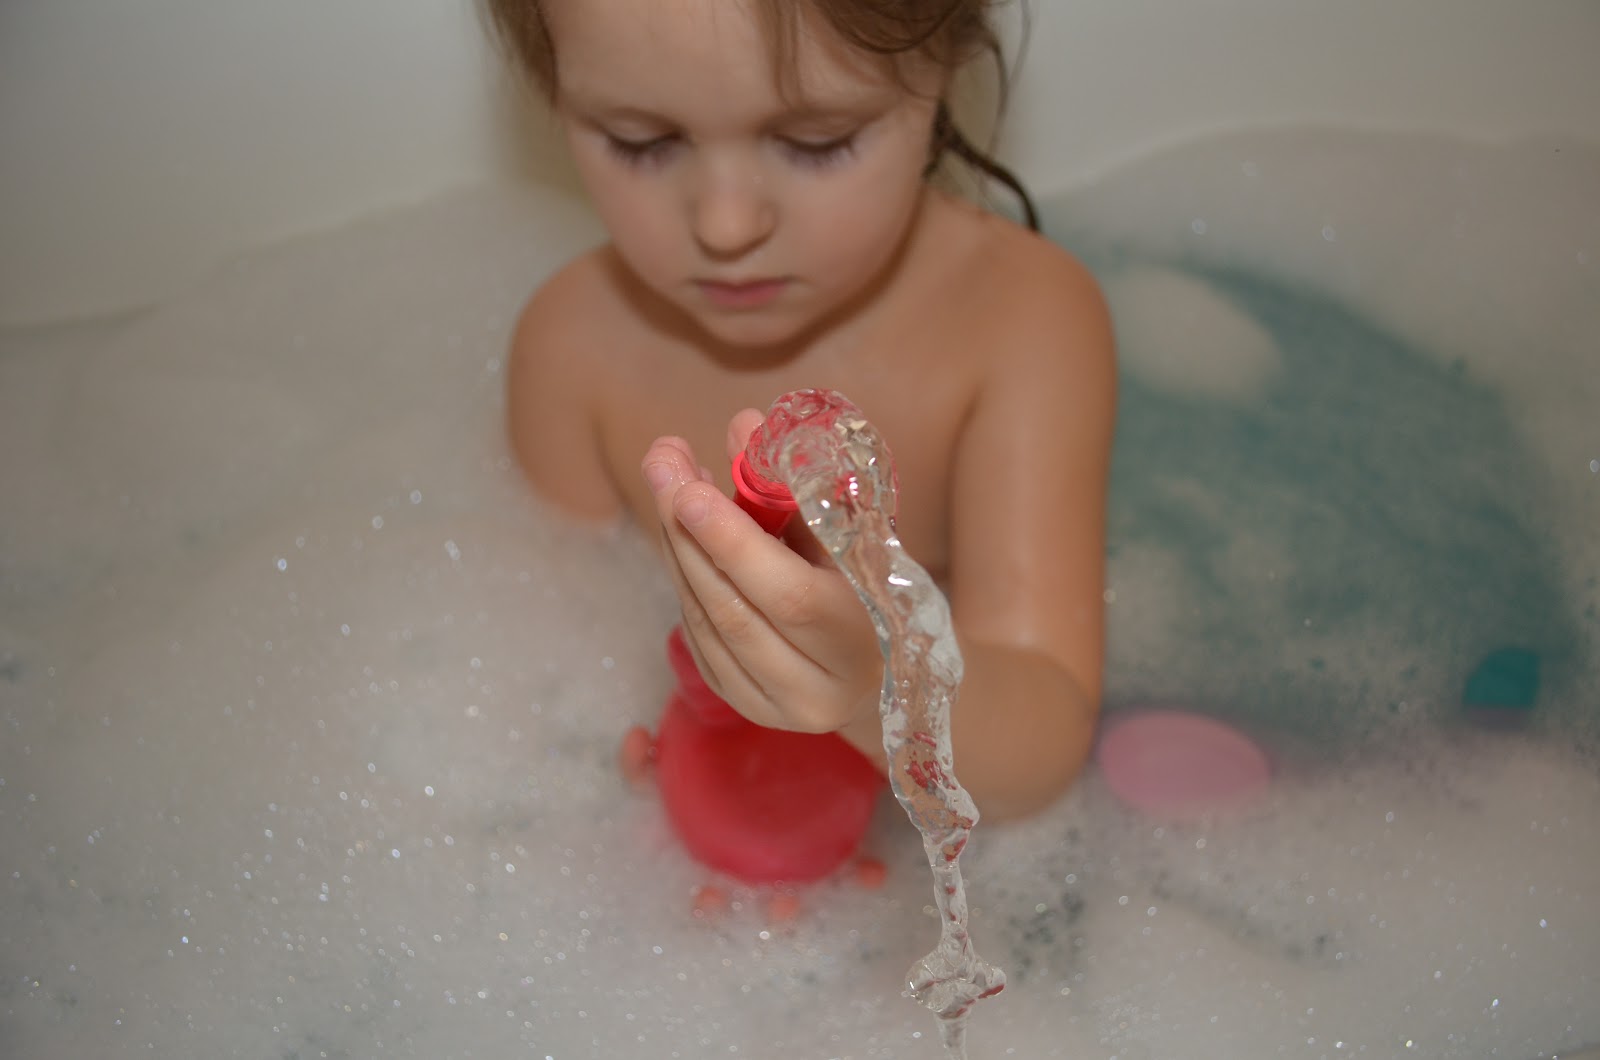
Water Balloons In The Bath
Pretty simple way to make bath time fun!
Just fill up a couple balloons with water and then hop in the tub! Right now we only have these really funky looking balloons that get really long. I gave her a pair of preschooler scissors and let her cut a hole in the balloons. We also had a blue bath tablet and bubble bath in, but the highlight was definitely the balloons!

Keeping Izzy entertained as well!

She cracks me up!

There are so many ways you can make this better! We were just taking a quick bath before bed this time, but if I really wanted to make it a full on activity I would probably have added some coloring to the water in the balloons and given her more than three to experiment with. Oh and you could even add water beads in the balloons too! Hmmm.....maybe next time!!
Check out Play At Home Mom to see where I got this awesome idea from!
Tuesday, February 7, 2012
No Mess Finger Painting
I am always looking for good ideas for activities that don't need to be totally supervised. It's good to have a few up your sleeves for those times when laundry or dinner need to get done. I saw this one on my good friend Kristen's (who is also helping to co-admin my Facebook Page) Pinterest board. I love this idea and it will probably be used many times, or as long as my kids find it interesting anyway.
This is a NO MESS Finger painting activity! You don't have to worry about paint getting ANYWHERE. Which is awesome. I did two different versions of this with my kids today and both work great. It just depends on what kind of finished product you (or your child in my case) would like to have. Caitlyn, my oldest, preferred the first method because it gives you a piece of art you can keep. So here they are.
You will need:
A large clear food storage bag
Paint, any colors
A piece of blank paper
Tape

Sunday, February 5, 2012
Brrr! It's Cold Outside!
It has been so cold here the last couple of days that we can't even go outside to play. I think we are all getting cabin fever! So we decided to take advantage of the negative degree weather and make some cool ice shapes. I dug out these heart shaped mini baking pans, the food coloring, some sprinkles, and a couple balloons.

Friday, February 3, 2012
Homemade Goop
I got the recipe for this Homemade Goop off of Ehow.com. It's really simple and easy for the kids to do. I found that this particular recipe turned out a bit stiff, so I think next time we'll try to make slime or putty, but she still had fun with this.
 |
Monday, January 30, 2012
Cloud Dough!!
Of course I found the recipe for this very simple play medium online. I saw it on Pinterest and had to make it. I get like that. You know, excited. Especially when something is this easy to make. This is called Cloud Dough and it is just:
8 cups of flour (I used whole wheat, it looked more like real sand)
And 1 cup Baby Oil

Seize the Moment(s)!
This one is pretty simple. No high-techiness to it whatsoever! My 4 year old asked me if we could make a car out of paper. And Voila! Here it is.
The only thing remarkable about it is the great talk we got to have about 3 dimensional objects. She now knows about height, length, and width. The point of this post is definitely not my great art work, but rather, if you can seize a moment like this, even a crappy paper car can be a learning experience!

Crayola Window Crayons
Draw on the Glass!
OK, so this one isn't so much a project, but I had to write about it, because my daughter LOVES these
Crayola Window Crayons! She draws on the mirrors and the windows. And they are super easy to clean. Just use a little window cleaner and they melt away. She spent over an hour expanding on this princess costume we made for her on the mirror. Really great for the imagination. I think I like to use them just as much as she does.


Saturday, January 28, 2012
Paper Boats And What Else Floats?
Our Random Boating Experiment
We were reading one of my daughter's short storybooks and at the end of the book there were instructions on how to make a paper boat. So, of course, we just had to try it out! We made the paper boat and filled her sensory bin with water + some blue food coloring to make it look like the ocean (per Caitlyns request). This was awesome by itself and it kept her enthralled for about 10 minutes, but it turned into so much more than a paper boat on water!

We were reading one of my daughter's short storybooks and at the end of the book there were instructions on how to make a paper boat. So, of course, we just had to try it out! We made the paper boat and filled her sensory bin with water + some blue food coloring to make it look like the ocean (per Caitlyns request). This was awesome by itself and it kept her enthralled for about 10 minutes, but it turned into so much more than a paper boat on water!

Lava Lamps
I think I saw this one on Pinterest and just had to try it with my girls. We also had a friend over too, which explains the other older child.
This is our homemade lava lamp experiment. This is basically just water, oil, food coloring, and Alka-Seltzer. There are several learning moments to be explored with this one. First there is the concept of density. Water and oil do not mix. Secondly, you can use the food coloring to mix colors. And then there is the reaction between the Alka-Seltzer and water that makes the bubbles. We loved doing this and still have them sitting around to use again!

Here Caitlyn is adding red to the blue because she wanted purple. This one is made with baby oil.
Thursday, January 26, 2012
Ice Painting

What you need:
Ice tray
Water
Food coloring
I can't even remember where I saw this one. But I really like the idea of painting with ice. It turned out to be a perfect time to learn about mixing colors and making new ones. Here she is making purple.

Subscribe to:
Posts (Atom)